How to Dry Hibiscus Flowers for Tea: A Step-by-Step Guide
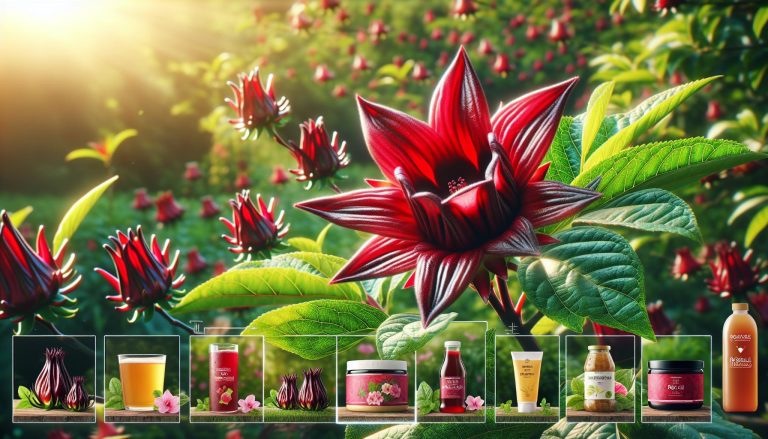
I’ve always been fascinated by the vibrant beauty and tangy flavor of hibiscus flowers. Did you know that these stunning blooms can be dried and used to make a delicious, refreshing tea? Not only is hibiscus tea a treat for your taste buds, but it’s also packed with vitamin C and antioxidants.
As an avid tea enthusiast, I’ve perfected the art of drying hibiscus flowers to create the perfect brew. Whether you’re looking to save money on store-bought tea or simply want to explore a new DIY project, learning how to dry hibiscus flowers is a rewarding experience. In this article, I’ll share my tried-and-true methods for preserving these colorful petals and transforming them into a flavorful, health-boosting beverage.
Benefits of Hibiscus Tea
Hibiscus tea offers a wealth of health benefits that make it a popular choice among tea enthusiasts. Here’s why you should consider adding this flavorful beverage to your daily routine:
- Rich in Antioxidants
- Packed with polyphenols and flavonoids
- Helps combat free radicals in the body
- Supports overall cellular health
- Supports Heart Health
- May help lower blood pressure
- Can reduce bad cholesterol levels
- Promotes better cardiovascular function
- Boosts Immune System
- High vitamin C content
- Strengthens body’s natural defenses
- Helps fight off common infections
- Aids in Weight Management
- Low in calories
- May help suppress appetite
- Supports metabolism
- Improves Digestion
- Contains natural acids that aid digestion
- Helps relieve constipation
- Supports gut health
| Nutrient | Amount per 100ml |
|---|---|
| Vitamin C | 77 mg |
| Calcium | 8 mg |
| Iron | 0.17 mg |
I’ve found that incorporating hibiscus tea into my daily routine has not only added a burst of flavor to my day but also contributed to my overall well-being. Its tangy taste and vibrant color make it a refreshing alternative to sugary drinks, especially during hot summer months.
Remember, while hibiscus tea offers numerous benefits, it’s always best to consult with a healthcare professional before making significant changes to your diet or if you have any pre-existing health conditions.
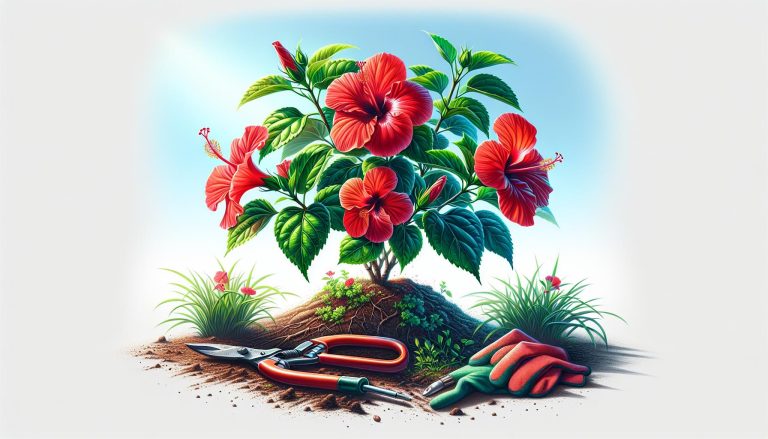
Selecting the Best Hibiscus Flowers for Drying
When it comes to drying hibiscus flowers for tea, choosing the right blooms is crucial. Here’s how to select the best flowers:
Timing Is Everything
Pick hibiscus flowers in the morning after the dew has evaporated. This ensures the petals are dry and at their peak flavor. Avoid harvesting during or after rain, as wet flowers are prone to mold during the drying process.
Look for Vibrant Colors
Select flowers with bright, intense colors. Deep reds, vibrant pinks, and rich purples indicate high concentrations of beneficial compounds. Pale or faded blooms often lack flavor and nutrients.
Check for Freshness
Choose flowers that are fully open but not past their prime. Fresh hibiscus blooms feel firm and crisp to the touch. Avoid wilted, brown-edged, or damaged flowers.
Size Matters
Opt for larger flowers when possible. They’re easier to handle and yield more dried material for tea. However, don’t sacrifice quality for size – a small, vibrant flower is better than a large, lackluster one.
Variety Selection
Different hibiscus varieties offer unique flavors:
- Hibiscus sabdariffa: Tart and tangy, ideal for traditional hibiscus tea
- Hibiscus rosa-sinensis: Milder flavor, great for blending
- Hibiscus syriacus: Subtle taste, perfect for delicate teas
Organic vs. Conventional
Choose organic flowers when available. They’re free from pesticides and chemicals that can affect taste and health benefits. If growing your own, avoid using synthetic fertilizers or pesticides.
| Tea Type | Flowers Needed |
|---|---|
| Single cup | 2-3 flowers |
| Small batch (4 cups) | 8-10 flowers |
| Large batch (1 gallon) | 20-25 flowers |
By following these guidelines, you’ll select the best hibiscus flowers for drying, ensuring a flavorful and nutritious tea. Remember, quality trumps quantity when it comes to hibiscus tea preparation.
Preparing Hibiscus Flowers for the Drying Process
Proper preparation of hibiscus flowers is crucial for creating high-quality tea. This process involves careful cleaning, inspection, and removal of unnecessary parts to ensure optimal flavor and aroma.
Cleaning and Inspecting the Flowers
I always start by gently rinsing the hibiscus flowers under cool, running water. This removes any dirt, insects, or debris. After rinsing, I spread the flowers on a clean towel and pat them dry. During this step, I inspect each flower closely:
- Look for discoloration or spots
- Remove any damaged petals
- Check for signs of disease or pests
For stubborn dirt, I use a soft-bristled brush to clean the flowers delicately. It’s important to handle the flowers with care to prevent bruising or tearing.
Removing Stems and Calyxes
Once the flowers are clean and dry, it’s time to remove the stems and calyxes:
- Gently grasp the base of the flower
- Twist and pull the petals away from the stem
- Separate the calyx (the green part at the base) from the petals
Here’s a quick guide to the parts you’ll keep and discard:
| Keep | Discard |
|---|---|
| Petals | Stems |
| Sepals | Calyxes |
| Stigmas | Leaves |
The petals and sepals contain the most flavor, while the stigmas add a subtle complexity to the tea. By removing the stems and calyxes, you’ll avoid any bitter taste in your final brew.
Remember, the goal is to preserve the flowers’ natural oils and flavors. Handling them gently throughout this process ensures you’ll get the best possible taste in your hibiscus tea.
Air-Drying Hibiscus Flowers
Air-drying is a simple, effective method for preserving hibiscus flowers for tea. This technique retains the flowers’ natural flavors and colors without additional equipment or energy costs.
Hanging Method
To air-dry hibiscus flowers using the hanging method:
- Gather small bunches of 5-7 flowers
- Tie stems together with twine or rubber bands
- Hang bunches upside down in a warm, dry, well-ventilated area
- Ensure bunches are spaced apart for air circulation
- Leave for 1-2 weeks until flowers are crisp and papery
I’ve found that attics, spare rooms, or covered porches work well for this method. Avoid direct sunlight, which can fade the flowers’ vibrant colors.
Flat Surface Method
The flat surface method is ideal for individual flowers or those with delicate stems:
- Line a tray or drying rack with cheesecloth or paper towels
- Arrange flowers in a single layer, not touching
- Place in a warm, dry area away from direct sunlight
- Turn flowers daily to prevent sticking and ensure even drying
- Dry for 7-10 days until crisp
This method works great for smaller batches or when you want to preserve the flowers’ shape. I’ve successfully used old window screens as makeshift drying racks, providing excellent air circulation.
Using a Food Dehydrator for Faster Results
A food dehydrator is a game-changer for drying hibiscus flowers quickly and efficiently. Here’s how to use one:
- Prep the flowers:
- Wash and pat dry the hibiscus blooms
- Remove stems and any damaged petals
- Separate large flowers into individual petals
- Arrange on dehydrator trays:
- Place petals in a single layer
- Avoid overlapping to ensure even drying
- Leave space between petals for air circulation
- Set temperature and time:
- Temperature: 95-115°F (35-46°C)
- Time: 4-8 hours, depending on petal thickness
- Check progress:
- Start checking after 4 hours
- Petals are done when crisp and crumbly
- Cool and store:
- Let petals cool completely before handling
- Store in airtight containers away from light and moisture
Pro tip: I’ve found that using a food dehydrator preserves the vibrant color of hibiscus petals better than air-drying methods.
| Dehydrator Method | Air-Drying Method |
|---|---|
| 4-8 hours | 1-2 weeks |
| Consistent results | Weather-dependent |
| Even drying | Potential uneven drying |
Oven-Drying Hibiscus Flowers
Oven-drying hibiscus flowers is a quick and effective method for those who don’t have a food dehydrator. Here’s how to do it:
- Prep the flowers:
- Wash the hibiscus flowers thoroughly
- Remove stems and calyxes
- Separate the petals
- Set up your oven:
- Preheat to the lowest setting (usually 150-170°F)
- Line baking sheets with parchment paper
- Arrange the petals:
- Spread petals in a single layer on the baking sheets
- Avoid overlapping to ensure even drying
- Drying process:
- Place the sheets in the oven
- Prop the oven door open slightly for air circulation
- Check every 30 minutes, rotating sheets if needed
- Monitor progress:
- Drying time varies from 2-4 hours
- Petals are ready when crisp and crumbly
- Cool and store:
- Remove from oven and let cool completely
- Store in airtight containers away from light and moisture
Oven-drying is faster than air-drying but requires more attention. It’s perfect for small batches or when you’re short on time. Remember, low and slow is key to preserving the hibiscus flowers’ flavor and color.
Storing Dried Hibiscus Flowers
After drying hibiscus flowers, proper storage is crucial to maintain their flavor and quality. Here’s how to store your dried hibiscus flowers effectively:
Airtight Containers
Store dried hibiscus flowers in airtight containers to prevent moisture and contaminants from affecting their quality. Options include:
- Glass jars with tight-fitting lids
- Food-grade plastic containers
- Vacuum-sealed bags
I prefer using glass jars because they’re easy to clean and don’t retain odors.
Cool, Dark Location
Keep your stored hibiscus flowers in a cool, dark place:
- Pantry
- Kitchen cabinet (away from heat sources)
- Basement (if dry)
Avoid storing them near windows or in direct sunlight, which can degrade their color and flavor.
Labeling
Label your containers with:
- Date of drying
- Quantity
- Intended use (tea, cooking, etc.)
This practice helps track freshness and organize your dried flower collection.
Moisture Control
To prevent moisture buildup:
- Add a food-grade silica gel packet to the container
- Check containers periodically for condensation
- Remove any damp flowers immediately
Moisture can lead to mold growth, ruining your entire batch.
Shelf Life
Properly stored dried hibiscus flowers typically last:
| Storage Method | Shelf Life |
|---|---|
| Airtight container | 1-2 years |
| Vacuum-sealed | 2-3 years |
| Refrigerated | Up to 3 years |
For the best flavor, use within the first year of drying.
Bulk Storage
If you’ve dried a large quantity:
- Divide into smaller portions
- Store in separate containers
- Open only what you need
This method prevents frequent exposure to air and moisture, extending the overall shelf life of your dried hibiscus flowers.
Brewing the Perfect Cup of Hibiscus Tea
Selecting the Right Water
For the best hibiscus tea, I use filtered or spring water. Tap water often contains chlorine and other chemicals that can affect the taste. The water’s quality significantly impacts the final flavor of your tea.
Water Temperature
I heat the water to just below boiling, around 200°F (93°C). This temperature extracts the optimal flavor without making the tea bitter. If you don’t have a thermometer, bring the water to a boil, then let it cool for about 30 seconds before steeping.
Steeping Time
Steeping time varies based on personal preference:
- Light flavor: 3-4 minutes
- Medium strength: 5-6 minutes
- Strong brew: 7-8 minutes
I prefer a 5-minute steep for a balanced flavor. Experiment to find your ideal time.
Tea-to-Water Ratio
For a single cup (8 oz) of hibiscus tea:
| Strength | Dried Hibiscus |
|---|---|
| Light | 1 teaspoon |
| Medium | 2 teaspoons |
| Strong | 1 tablespoon |
Adjust the ratio to suit your taste preferences.
Sweetening Options
Hibiscus tea has a tart flavor. If you prefer it sweeter, try these options:
- Honey: Adds a natural sweetness
- Stevia: A calorie-free alternative
- Agave nectar: Provides a smooth, mild sweetness
Add sweeteners while the tea is hot for better dissolution.
Serving Suggestions
Serve hibiscus tea hot or cold:
- Hot: Pour into a preheated mug to maintain temperature
- Iced: Brew double strength, then pour over ice
Garnish with a lemon wedge or mint sprig for added flavor and visual appeal.
Conclusion
Drying hibiscus flowers for tea is a rewarding process that allows you to enjoy this healthful beverage year-round. Whether you choose to use a food dehydrator oven or air-drying method proper storage is key to preserving the flowers’ flavor and benefits. With the right techniques you’ll be able to create your own custom blends and savor the vibrant taste of hibiscus tea whenever you like. Remember to experiment with brewing methods and additions to find your perfect cup. Happy drying and happy sipping!