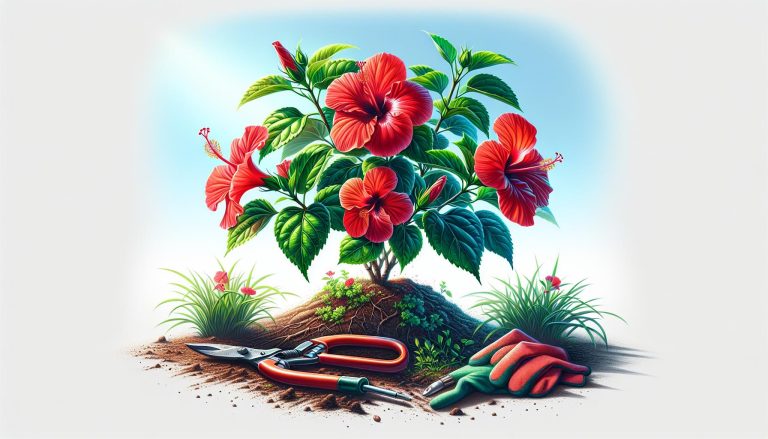
Caring for Your Braided Hibiscus Tree Guide
Have you ever experienced the joy of growing a braided hibiscus tree? There’s something truly magical about watching those slender trunks intertwine and create a stunning work of art. As I sit in my garden, admiring the vibrant blooms and lush foliage of my braided hibiscus tree, I can’t help but feel a deep sense of connection to nature.
Every morning, as I sip my coffee and bask in the warmth of the rising sun, I am reminded of the importance of caring for this beautiful creation. It’s not just about watering and pruning; it’s about nurturing and tending to every aspect of its existence. The way we care for our braided hibiscus trees reflects our own capacity to love and nurture.
In this guide, I want to share with you the tips and techniques that have helped me nurture my braided hibiscus tree into a vibrant and thriving masterpiece. Whether you’re a seasoned gardener or just starting your green journey, these care tips will empower you to create your very own tropical oasis.
So, let’s dive in and unlock the secrets to caring for your braided hibiscus tree, ensuring it flourishes with beauty and grace.
Key Takeaways:
- Creating a braided hibiscus tree involves intertwining young hibiscus trees’ slender stems during early growth stages.
- Braided hibiscus trees thrive in full sunlight and require well-drained, slightly acidic soil.
- Consistent watering, regular pruning, and proper winter care are essential for the health and vibrancy of your braided hibiscus tree.
- Common pests, such as aphids and spider mites, can be controlled using organic insecticides.
- Regular fertilization with a balanced hibiscus fertilizer promotes blooming and healthy growth.
With a little love and attention, your braided hibiscus tree will become a captivating centerpiece in your garden, filling the air with its enchanting fragrance and adding a touch of tropical paradise to your outdoor space. Let’s begin this journey together and unlock the magnificent potential of your braided hibiscus tree.
What is a Braided Hibiscus?
A braided hibiscus is a captivating variation of the Hibiscus rosa-sinensis, featuring multiple young hibiscus trees with intertwined stems. This unique braided effect is achieved by delicately twisting the slender stems together during the early stages of growth. Braided hibiscus trees typically grow into small shrubs, reaching heights of 5 to 6 feet, making them ideal for adding a touch of tropical elegance to any space.
Although traditionally grown in USDA plant hardiness zones 9 and 10, braided hibiscus trees can also thrive as patio plants in cooler climates. These beauties are adored for their vibrant blooms and the artistic appeal of their twisting trunks. With the proper care and attention, braided hibiscus trees can become stunning focal points in gardens and indoor spaces, bringing a touch of natural beauty wherever they are placed.
| Common Name | Scientific Name | Height | Hardiness Zones |
|---|---|---|---|
| Braided Hibiscus | Hibiscus rosa-sinensis | 5 to 6 feet | Zones 9 and 10 |
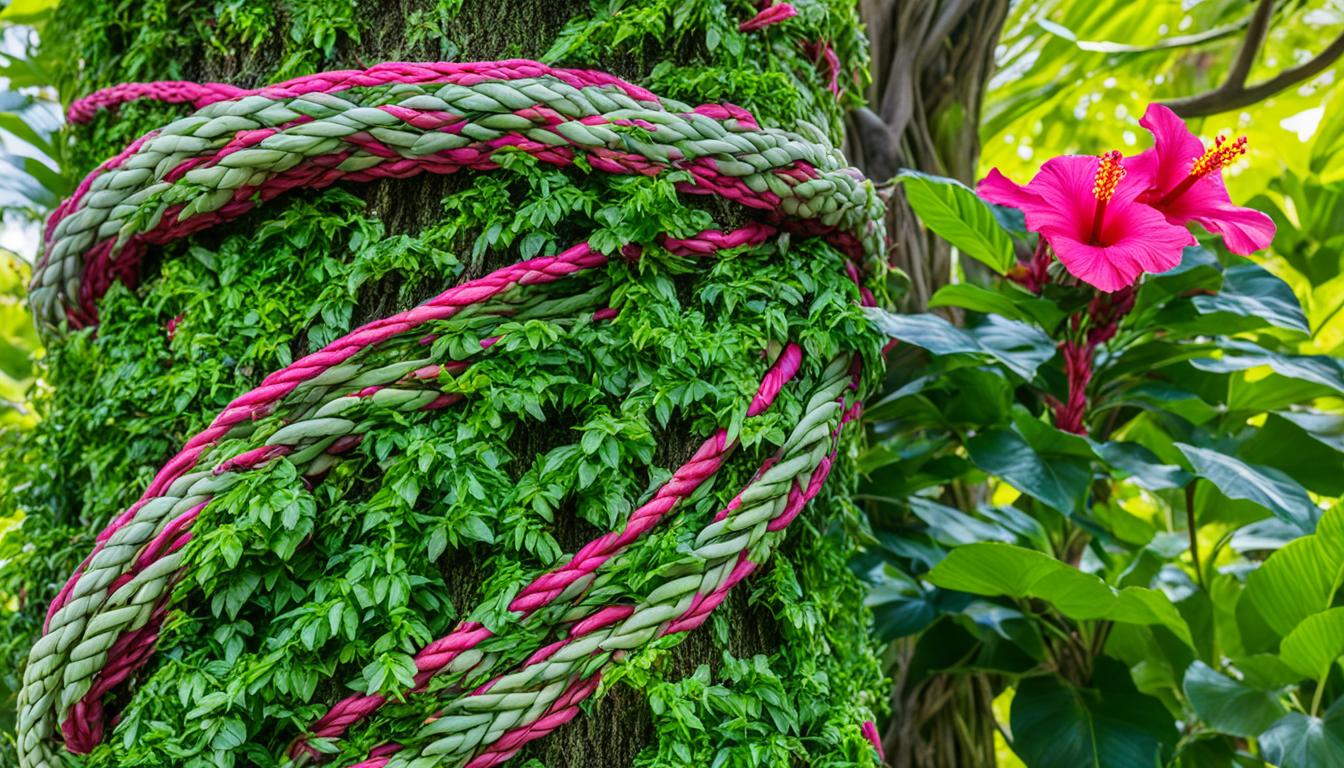
How to Form a Hibiscus Braided Tree
To create a braided hibiscus tree, you will need four young hibiscus trees with slender stems. Follow these steps to successfully train and shape your braided hibiscus tree:
- Start by selecting four young hibiscus trees that have slender stems. These young trees will be easier to bend and intertwine.
- Plant the hibiscus trees closely together in a deep pot. This will allow the stems to grow close to each other and facilitate braiding.
- Carefully twist and intertwine the stems of the hibiscus trees, starting with the outer ones and working your way towards the top foliage. Take your time to create a neat and even braid.
- Once the stems are intertwined, lightly tie them together to secure the braid. Be careful not to tie them too tightly, as this could restrict growth.
- After braiding, it’s important to shape the canopy of the hibiscus tree. Prune out any straggly stems and maintain a round appearance. This will help the tree maintain its desired shape.
- Continue to prune the hibiscus tree regularly to promote side shoot growth and maintain its shape. Pruning can be done in early spring or late winter, before the tree starts actively growing again.
By following these steps, you can successfully form a beautiful and unique braided hibiscus tree.

Sunlight Requirements for Braided Hibiscus
Braided hibiscus trees thrive in full sunlight and require at least 6-8 hours of direct sunlight per day. Sunlight is an essential factor for the healthy growth and blooming of your braided hibiscus tree. Whether you’re growing your tree outdoors or indoors, providing adequate sunlight is key to its overall well-being.
When choosing a spot for your braided hibiscus tree in your garden, select a location that receives ample sunlight throughout the day. This means finding an area that is not blocked by tall buildings or overshadowed by trees. Giving your tree unrestricted access to sunlight will ensure it receives the necessary energy for photosynthesis and growth.
If you’re keeping your braided hibiscus tree indoors, place it in a sunny window or a location with bright, indirect light. South-facing windows are ideal, as they provide the most direct sunlight throughout the day. However, east-facing or west-facing windows can also work as long as they receive a sufficient amount of sunlight.
Remember that sunlight is a crucial element for the healthy development of your braided hibiscus tree. Be sure to monitor the sunlight exposure and make adjustments accordingly, ensuring your tree flourishes under the optimal lighting conditions.
Best Soil for Braided Hibiscus
When it comes to choosing the best soil for your braided hibiscus, there are a few key factors to consider. While these tropical plants can tolerate a variety of soil types, it is important to provide them with the ideal growing conditions to ensure their health and vitality.
Well-Drained and Moist Soil
Braided hibiscus trees thrive in soil that is well-drained and adequately moist. This means that the soil should not retain excessive moisture, as this can lead to root rot and other fungal diseases. To promote proper drainage, consider adding organic matter such as compost or peat moss to the soil. These amendments help improve moisture retention while preventing waterlogging.
Slightly Acidic pH
While braided hibiscus trees prefer slightly acidic soil, they can still thrive in soil with a pH range of 6 to 7. To achieve the desired acidity level, you can use a soil pH testing kit available at most garden centers. If the soil pH is too high, you can lower it by adding organic matter or using an acidifying agent specifically formulated for plants.
Adding Compost for Nutrients
Adding compost to the soil can provide your braided hibiscus tree with essential nutrients for optimal growth. Compost improves soil structure, enhances moisture retention, and releases nutrients gradually over time. You can either incorporate well-rotted compost into the soil when planting or apply a layer of compost as a top dressing around the base of the tree.

Overall, providing a well-drained and slightly acidic soil enriched with organic matter is the key to ensuring your braided hibiscus tree’s success. With the right soil conditions, your hibiscus tree will grow healthy and vibrant, showcasing its beautiful flowers.
Watering Schedule for Braided Hibiscus
Proper watering is essential for the health and vitality of your braided hibiscus tree. By following a consistent watering schedule, you can ensure that your plant remains hydrated and thrives throughout the year.
During the summer months, when the weather is warmer and the plant is actively growing, it’s important to water your braided hibiscus tree daily. This will help to keep the soil evenly moist and provide the necessary hydration for optimal growth.
In the winter, when the plant is in a dormant state, you’ll need to decrease the frequency of watering to prevent overwatering. As the soil dries out slower during this time, it’s best to water your braided hibiscus tree only when the topsoil feels dry to the touch. This will help to avoid waterlogged conditions that can lead to root rot.
When watering your braided hibiscus tree, it’s important to water from the bottom to avoid wetting the leaves. Wet leaves can create a favorable environment for fungal diseases to develop. By watering the plant at the base, you can ensure that the roots receive the necessary moisture without increasing the risk of disease.
Monitoring the moisture levels of the soil is crucial in maintaining an appropriate watering schedule. Use your finger to check the moisture level by inserting it about an inch into the soil. If it feels dry, it’s time to water. Adjust your watering schedule based on the moisture levels and the specific needs of your braided hibiscus tree.
By following a consistent watering schedule and paying attention to the moisture needs of your braided hibiscus tree, you can provide the optimal conditions for growth and ensure that your plant remains healthy and vibrant.
Pruning Braided Hibiscus
Regular pruning is essential for maintaining the shape and health of your braided hibiscus tree. After braiding the stems, shape the plant’s canopy by pruning out any straggly or overgrown stems. This helps to promote side shoot growth and prevents the need for a massive root system. Additionally, you should remove dead flowers and leaves to keep the plant looking beautiful and prevent excessive seed formation. Pruning should be done in early spring or late winter, before the plant starts actively growing again.
When pruning your braided hibiscus, it’s important to follow a few guidelines to ensure the best results. Here are some tips to keep in mind:
- Begin with clean and sharp tools: Use clean, sterilized pruning shears or loppers to make clean cuts. This helps prevent the spread of diseases and encourages proper healing.
- Remove any dead or diseased branches: Start by inspecting the tree for any dead or diseased branches. These should be cut all the way back to healthy wood to prevent the spread of diseases.
- Shape the canopy: Trim back any straggly or overgrown branches to maintain the desired shape of your braided hibiscus. Be mindful of the overall balance and aesthetics of the tree.
- Promote side shoot growth: Pruning removes apical dominance, allowing side shoots to grow and create a fuller canopy. Make cuts just above a bud or lateral shoot facing the direction you want the new growth to go.
- Remove spent flowers: Remove any faded or spent flowers to encourage the production of new blooms. This also prevents the formation of seeds, which can divert energy away from flower production.
Remember to take your time when pruning and step back occasionally to assess the overall shape and symmetry of your braided hibiscus tree. With regular and proper pruning, you can keep your tree healthy, vibrant, and visually appealing.

Repotting Braided Hibiscus
Repotting your braided hibiscus tree every three years is essential to ensure healthy growth and provide adequate space for the roots to expand. Follow these steps to successfully repot your braided hibiscus:
- Choose a larger pot: Select a pot that is one size larger than the current one. This will give the roots enough room to grow.
- Use good quality soil mix: Opt for a well-draining houseplant soil mix that provides the necessary nutrients for your braided hibiscus tree.
- Prepare the new pot: Ensure that the new pot has drainage holes at the bottom to allow excess water to escape. Place a layer of small stones or broken pottery pieces at the bottom to prevent soil from clogging the drainage holes.
- Remove the plant from the old pot: Gently loosen the root ball by tapping the sides of the pot. Carefully lift the braided hibiscus tree out of the old pot, holding it by the base of the stems.
- Inspect the roots: Check the roots for any signs of damage or overcrowding. If necessary, gently untangle any matted roots to encourage healthy growth.
- Position the plant in the new pot: Place the braided hibiscus tree in the center of the new pot, ensuring that it sits at the same depth as it was in the previous pot.
- Add soil and firm it gently: Fill the gaps around the root ball with the prepared soil mix, pressing it gently to eliminate any air pockets.
- Water the plant: Give the newly potted braided hibiscus tree a thorough watering to settle the soil and promote root establishment.
It is recommended to repot your braided hibiscus tree in early spring, when the plant is not actively growing. Gradually introduce the tree to brighter light if you plan to move it outside. Remember to bring your braided hibiscus tree indoors before cold temperatures arrive to protect it from frost damage.
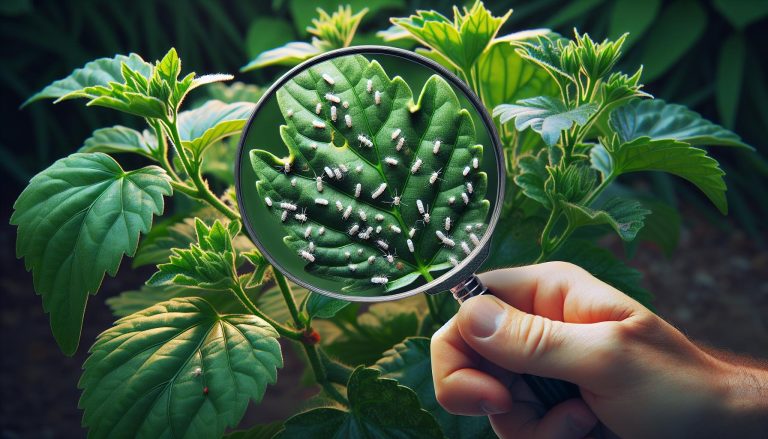
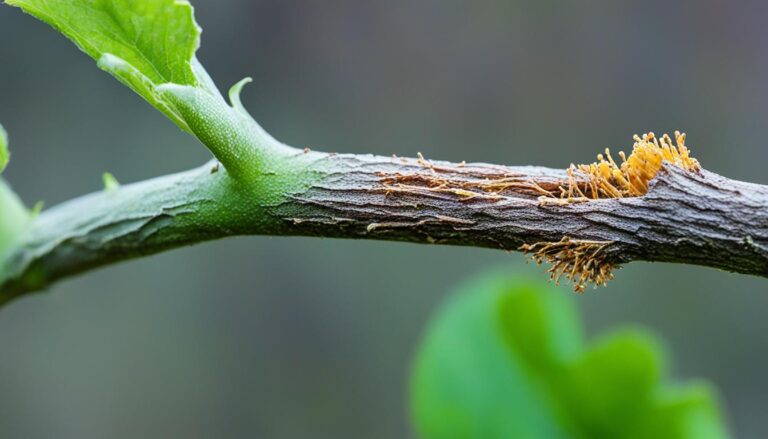
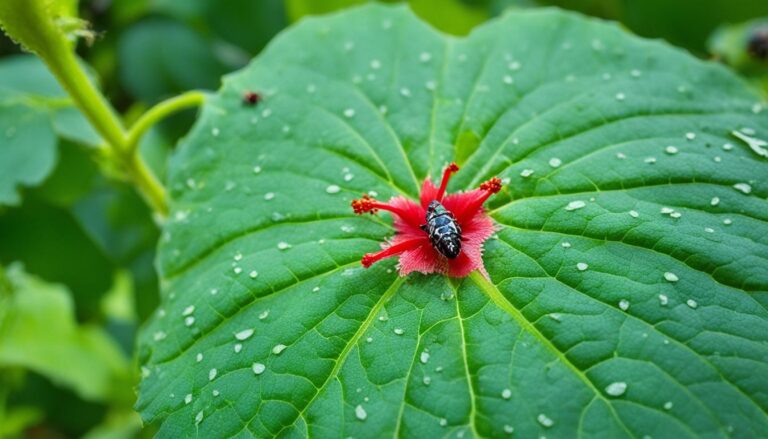
Common Pests of Braided Hibiscus
Braided hibiscus trees, like any other plant, can fall victim to various pests that can cause damage to their leaves and flowers. It’s important to regularly inspect your braided hibiscus tree for signs of pest infestation, as early detection and treatment can prevent further damage and ensure the health of your plant. Some common pests that may affect your braided hibiscus tree include:
Aphids
Aphids are small, soft-bodied insects that can be found in clusters on the underside of leaves or along the stems of your hibiscus tree. They feed on the plant sap, causing leaves to curl and distort. To control aphids, you can use organic insecticidal soap or a strong blast of water to dislodge and remove them.
Whiteflies
Whiteflies are tiny, white flying insects that suck sap from the leaves of your braided hibiscus tree. They can cause yellowing of leaves and the growth of black mold. To control whiteflies, you can use yellow sticky traps or insecticidal soap to catch and eliminate them. Introducing natural predators like ladybugs can also help control whitefly populations.
Spider Mites
Spider mites are tiny pests that can be difficult to spot with the naked eye. They feed on the undersides of leaves, causing yellowing, stippling, and webbing. To control spider mites, you can use a strong blast of water to dislodge them or apply neem oil spray, which acts as a natural insecticide.
When treating your braided hibiscus tree for pests, it’s important to follow the instructions on any organic insecticidal soap or spray. Treat the infestation promptly and monitor your plant for any signs of reinfestation. Regularly inspecting your braided hibiscus tree and practicing good pest control measures will help keep your plant healthy and thriving.

| Pest | Signs of Infestation | Pest Control |
|---|---|---|
| Aphids | Clusters on the underside of leaves, distorted leaves | Organic insecticidal soap, strong water spray |
| Whiteflies | White flying insects, yellowing leaves, black mold | Sticky traps, insecticidal soap, natural predators |
| Spider Mites | Underside of leaves, yellowing, stippling, webbing | Water spray, neem oil spray |
Fertilizing Braided Hibiscus
Fertilizing your braided hibiscus tree is essential for promoting blooming and ensuring healthy growth. By providing the necessary nutrients, you can help your hibiscus tree thrive and produce vibrant flowers.
When selecting a fertilizer for your braided hibiscus, opt for a slow-release, balanced formula specifically formulated for hibiscus plants. This will provide a controlled release of nutrients over time, helping to avoid fertilizer burn or nutrient deficiencies. Follow the instructions on the package for the proper dosage and application method.
During the growing season, it is recommended to fertilize your braided hibiscus tree every two weeks. This regular feeding schedule ensures a consistent supply of nutrients to support optimal growth and flowering.
Trimming for New Growth
In early spring, give your braided hibiscus tree a “haircut” by trimming back the stems. This pruning technique helps to stimulate new growth and promote a fuller, healthier plant. Use sharp and clean pruning shears to make clean cuts above a healthy leaf node.
Regular fertilization not only provides essential nutrients but also encourages your hibiscus tree to produce more robust branches and a greater number of flowers.
Preventing Over-Fertilization
While fertilizing is crucial for the health of your hibiscus tree, it’s important to avoid over-fertilization. Excessive amounts of fertilizer can lead to excessive foliage growth at the expense of flower production.
Monitor your hibiscus tree for signs of over-fertilization, such as lush green leaves but few blooms. If you observe these signs, reduce the frequency or amount of fertilizer you apply. Remember to always follow the recommended dosage and application instructions on the fertilizer package.
| Fertilizer | NPK Ratio | Application Frequency |
|---|---|---|
| Slow-release, balanced hibiscus fertilizer | 10-10-10 or 20-20-20 | Every two weeks during the growing season |
Hibiscus Tree Care During Winter
Winter care is crucial for the health and survival of your braided hibiscus tree. The cold temperatures can be detrimental to the plant, so it is important to take proactive steps to protect it. Here are some tips for caring for your hibiscus tree during the winter months:
1. Move Indoors
Before winter arrives, dig up your braided hibiscus tree and relocate it indoors. Choose a pot that is large enough to accommodate the root system and provide ample space for growth. Placing the plant in a warm and sunny spot, such as near a south-facing window, will help it thrive during the winter.
2. Water Sparingly
During winter, the soil of your hibiscus tree will dry out slower due to the reduced evaporation rate. Therefore, it is important to water the plant sparingly. Only water when the topsoil is dry, and make sure not to overwater as this can lead to root rot. Keeping the soil slightly damp but not waterlogged is key for proper hibiscus tree care in winter.
3. Monitor for Stress and Disease
Monitor your braided hibiscus tree regularly for any signs of stress or disease. Yellowing leaves can indicate issues such as nutrient deficiencies or improper watering. If you notice any discoloration or abnormalities, take appropriate action to address the problem and ensure the health of your plant.
4. Protect from Frost
Frost can be extremely damaging to hibiscus trees, so it is essential to provide adequate protection. If your hibiscus is located near a window, consider moving it away to prevent cold drafts. Covering the plant with a frost blanket or bringing it to a warmer area of the house during particularly cold nights can help protect it from frost damage.
5. Maintain Ideal Temperature
During winter, it is important to maintain a temperature range of 60-85 degrees Fahrenheit for your hibiscus tree. Temperatures below 55 degrees can stunt growth and prevent flowering, while temperatures above 90 degrees can cause leaf yellowing and drop. Ensuring the plant is in a suitable temperature range will promote healthy growth and blooming.
By following these care tips, you can ensure that your braided hibiscus tree remains healthy and protected during the winter months. Remember to move it indoors, water sparingly, monitor for stress and disease, protect from frost, and maintain the ideal temperature. With proper care, your hibiscus tree will thrive and bring beauty to your indoor space.
How Often Should You Water Hibiscus in Winter?
During the winter months, it is important to adjust your watering schedule for your braided hibiscus tree. Unlike in the summer when the plant requires daily watering, winter calls for a reduced frequency to prevent overwatering and potential root rot.
As a general rule, water your hibiscus tree in winter only when the topsoil feels dry to the touch. Using your finger, gently assess the moisture level of the soil to determine if watering is necessary. Remember, the reduced evaporation during winter means that the plant doesn’t lose as much water to the atmosphere as it does in the warmer months.
Avoid the temptation to overwater your braided hibiscus tree in winter, as excess moisture can lead to root rot and other complications. It’s crucial to strike a balance between providing enough hydration and ensuring the soil does not become waterlogged. Adjust your watering schedule based on the weather conditions and the specific needs of your plant.
Monitoring the moisture level of the soil is key to maintaining the health and vitality of your braided hibiscus tree during winter. By keeping a close eye on the watering needs and adjusting accordingly, you can ensure that your beloved plant remains properly hydrated without risking damage from overwatering or drought.
Remember, each hibiscus tree is unique, and factors such as humidity levels, pot size, and the specific climate will influence how often you should water your braided hibiscus in winter. Stay attentive to your plant’s needs, and you’ll be rewarded with a flourishing braided hibiscus tree that thrives even in the colder months.
How to Re-Pot Your Hibiscus in Winter
Repotting your hibiscus tree in winter requires special care to ensure its well-being during the dormant season. Here are some steps to follow when transitioning your plant to a new pot:
- Prepare the plant: Before moving the hibiscus indoors, gently wash the plant to remove any pests, dust, or debris. This will help maintain its health and prevent the introduction of unwanted critters into your home.
- Avoid fertilization: During the winter months, the hibiscus tree is in a dormant state, and its nutrient needs are minimal. It is best to avoid adding fertilizer during this time to prevent overstimulation of the plant’s growth.
- Choose the right location: Find a suitable spot in your home that receives sufficient sunlight for your hibiscus tree. Place the pot near a bright window or provide supplemental grow lights to ensure the plant gets enough light during the winter months.
- Water sparingly: During the dormant period, hibiscus trees require less water than during the active growth season. Water the plant sparingly, allowing the top few inches of soil to dry out between waterings.
- Adjustment period: When you move your hibiscus tree indoors, it may experience some leaf yellowing or shedding as it transitions from full sun exposure to partial sun. This is normal and should resolve as the plant adapts to its new environment.
Re-potting your hibiscus tree should ideally be done in early spring when the plant begins to actively grow again. By following these guidelines, you can ensure a smooth transition for your hibiscus tree and help it thrive throughout the winter months.

Table: Repotting Hibiscus in Winter Checklist
| Steps | Description |
|---|---|
| Prepare the plant | Gently wash the hibiscus to remove pests and debris. |
| Avoid fertilization | Refrain from adding fertilizer during the hibiscus’ dormant period. |
| Choose the right location | Select a bright spot indoors with sufficient sunlight. |
| Water sparingly | Allow the top few inches of soil to dry out between waterings. |
| Adjustment period | Expect temporary leaf yellowing or shedding as the plant adjusts to its new environment. |
Best Temperature for a Full-Grown Hibiscus Tree
Full-grown hibiscus trees require specific temperature conditions to thrive and display their vibrant blooms. Maintaining the optimal temperature range is essential for the overall health and growth of your braided hibiscus tree.
For optimal results, the best temperature range for a full-grown hibiscus tree is between 60-85 degrees Fahrenheit. Within this range, the tree can flourish, producing abundant flowers and maintaining healthy foliage.
It’s important to note that temperatures below 55 degrees Fahrenheit can have adverse effects on a hibiscus tree. Cooler temperatures can slow down growth and inhibit flowering, resulting in a less vibrant and lush plant. Conversely, temperatures above 90 degrees Fahrenheit can place stress on the tree, causing the leaves to yellow and drop prematurely.
By providing the optimal temperature range, you can ensure that your full-grown hibiscus tree remains healthy and beautiful throughout the year. Consider the temperature requirements when choosing the location for planting and be prepared to provide additional protection during extreme temperatures to safeguard the well-being of your hibiscus tree.
Conclusion
Caring for a braided hibiscus tree is essential to ensure its healthy growth and vibrant appearance. By following these tips for caring for a braided hibiscus tree, you can create an enchanting tropical oasis in your garden or indoor space.
Make sure to provide your braided hibiscus tree with ample sunlight. This plant thrives in full sunlight, so find a sunny spot that receives at least 6-8 hours of direct sunlight every day. Additionally, choose well-draining soil that is slightly acidic to create the optimal growing conditions for your tree.
Water your braided hibiscus tree regularly, keeping the soil evenly moist during the summer months. Be mindful of overwatering to prevent root rot. Regular pruning is also necessary to maintain the tree’s desired shape and promote new growth. Finally, protect your braided hibiscus tree from frost during winter by moving it indoors or providing adequate insulation.
With proper care and attention, your braided hibiscus tree will reward you with stunning flowers and a touch of exotic beauty in your surroundings.