Hibiscus Propagation in Soil: Easy Steps for Growing Beautiful Blooms at Home
As a passionate gardener, I’ve always been fascinated by the vibrant beauty of hibiscus flowers. Did you know that propagating hibiscus in soil is an easy and rewarding way to expand your garden? It’s true! With just a few simple steps, you can create new plants from your existing hibiscus and watch them thrive.
Understanding Hibiscus Plants
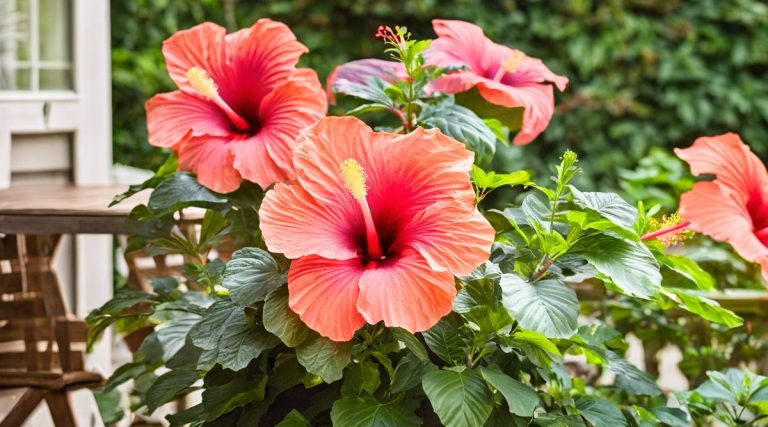
Hibiscus plants are known for their vibrant, showy flowers and tropical allure. They’re versatile plants that can thrive in various climates, making them popular among gardeners worldwide.
Types of Hibiscus Suitable for Soil Propagation
Several hibiscus varieties are well-suited for soil propagation:
- Tropical hibiscus (Hibiscus rosa-sinensis):
- Large, colorful flowers
- Ideal for warm climates
- Propagates easily from cuttings
- Hardy hibiscus (Hibiscus moscheutos):
- Dinner plate-sized blooms
- Cold-hardy to USDA zones 4-9
- Propagates well from root divisions
- Rose of Sharon (Hibiscus syriacus):
- Shrub-like growth habit
- Tolerates various soil types
- Propagates from softwood cuttings
- Confederate rose (Hibiscus mutabilis):
- Color-changing flowers
- Drought-tolerant once established
- Propagates readily from stem cuttings
- Hawaiian hibiscus (Hibiscus brackenridgei):
- Hawaii’s state flower
- Thrives in tropical climates
- Propagates through seed or stem cuttings
These varieties offer diverse options for soil propagation, catering to different garden styles and climate conditions.
Benefits of Propagating Hibiscus in Soil
Propagating hibiscus in soil offers numerous advantages for gardeners. Here’s why it’s a fantastic method for expanding your hibiscus collection:
- Cost-effective:
- Save money on new plants
- Create multiple plants from a single parent
- Genetic preservation:
- Maintain desirable traits of parent plants
- Ensure consistent flower colors and patterns
- Adaptability:
- Soil-propagated plants adjust easily to garden conditions
- Develop strong root systems for better nutrient uptake
- Simplicity:
- Requires minimal equipment
- Suitable for beginners and experienced gardeners alike
- Higher success rate:
- Soil provides essential nutrients and moisture
- Protects developing roots from environmental stress
- Flexibility:
- Propagate various hibiscus species using the same method
- Experiment with different soil mixes for optimal results
- Year-round propagation:
- Indoor soil propagation possible in any season
- Extend growing season for outdoor plants
- Disease prevention:
- Soil acts as a barrier against pathogens
- Reduces risk of contamination compared to water propagation
- Stronger plants:
- Soil-propagated hibiscus develop robust root systems
- Improved drought tolerance and overall plant health
- Customization:
- Tailor soil mix to specific hibiscus varieties
- Optimize growth conditions for each cutting
I’ve found that soil propagation is particularly effective for tropical hibiscus varieties. The method’s versatility allows gardeners to experiment with different soil compositions, catering to the unique needs of each hibiscus type. By propagating in soil, you’re setting your hibiscus cuttings up for long-term success in your garden.
Preparing for Hibiscus Propagation
Successful hibiscus propagation starts with proper preparation. Let’s dive into the essential steps to set up your propagation project for success.
Selecting the Right Soil
Choosing the right soil is crucial for hibiscus propagation. I’ve found that a well-draining, nutrient-rich mix works best. Here’s what to look for:
- Texture: Loamy soil with good aeration
- pH level: Slightly acidic (6.0-6.5)
- Organic matter: 30-40% of the mix
- Drainage: Quick-draining to prevent root rot
A blend of potting soil, perlite, and peat moss in equal parts creates an ideal environment for hibiscus cuttings. This mix provides:
- Adequate moisture retention
- Sufficient air pockets for root development
- Essential nutrients for early growth stages
Avoid heavy clay soils or those that retain too much water, as they can lead to root problems and hinder growth.
Gathering Essential Tools and Materials
To propagate hibiscus successfully, you’ll need these tools and materials:
- Pruning shears: Clean, sharp for precise cuts
- Rooting hormone: Powder or gel form
- Pots: 4-6 inch containers with drainage holes
- Clear plastic bags: For creating mini-greenhouses
- Spray bottle: For misting cuttings
- Labels: To mark different varieties
- Thermometer: To monitor soil temperature
| Tool/Material | Purpose |
|---|---|
| Pruning shears | Taking clean cuttings |
| Rooting hormone | Stimulating root growth |
| Pots | Holding soil and cuttings |
| Plastic bags | Maintaining humidity |
| Spray bottle | Keeping cuttings moist |
| Labels | Identifying plant varieties |
| Thermometer | Monitoring soil conditions |
Having these items ready before you start will streamline the propagation process and increase your chances of success. Remember to sanitize your tools before use to prevent disease transmission.
Methods of Hibiscus Propagation in Soil
Hibiscus propagation in soil offers several effective methods to grow new plants. Each technique has its advantages and suits different gardening scenarios. Let’s explore the three main methods: stem cutting, seed propagation, and division.
Stem Cutting Propagation
Stem cutting is a popular and reliable method for propagating hibiscus. Here’s how to do it:
- Select a healthy stem: Choose a 4-6 inch section from a mature, disease-free plant.
- Prepare the cutting: Remove lower leaves, leaving 2-3 at the top.
- Apply rooting hormone: Dip the cut end in rooting hormone powder.
- Plant in soil: Insert the cutting into moist, well-draining potting mix.
- Create humidity: Cover with a clear plastic bag to maintain moisture.
- Provide warmth: Keep the soil temperature around 70-75°F (21-24°C).
- Monitor progress: Roots typically develop in 3-4 weeks.
Seed Propagation
Seed propagation is an economical way to grow hibiscus, but it’s slower than other methods:
- Collect seeds: Harvest seeds from ripe hibiscus pods.
- Scarify seeds: Gently nick the seed coat to improve germination.
- Soak seeds: Place in warm water for 24 hours before planting.
- Prepare soil: Use a sterile, well-draining seed-starting mix.
- Plant seeds: Sow 1/4 inch deep and keep soil moist.
- Provide light: Ensure seeds receive bright, indirect light.
- Maintain temperature: Keep soil between 70-80°F (21-27°C).
- Transplant seedlings: Move to individual pots when they have 2-3 sets of true leaves.
- Timing: Divide plants in early spring before new growth starts.
- Prepare the plant: Water thoroughly the day before dividing.
- Dig up the plant: Carefully remove the entire plant from the ground.
- Separate roots: Gently pull apart the root ball into sections.
- Trim roots: Cut away any damaged or diseased roots.
- Replant divisions: Place in prepared soil at the same depth as before.
- Water and mulch: Keep soil moist and apply a layer of organic mulch.
- Aftercare: Provide partial shade for a few weeks until new growth appears.
Step-by-Step Guide to Hibiscus Propagation
Propagating hibiscus in soil is a rewarding process that allows you to expand your garden with beautiful, vibrant plants. This guide breaks down the essential steps for successful hibiscus propagation.
Preparing the Soil
Hibiscus thrives in well-draining, nutrient-rich soil. Here’s how to prepare the perfect mix:
- Combine equal parts potting soil, perlite, and peat moss
- Add a slow-release fertilizer to the mix
- Ensure the pH level is between 6.0 and 6.5
- Sterilize the soil mix by baking it at 180°F for 30 minutes
Pro tip: I’ve found that adding a handful of coarse sand improves drainage, which is crucial for hibiscus root development.
Taking and Planting Cuttings
To propagate hibiscus from cuttings:
- Select a healthy, 4-6 inch stem with 2-3 leaf nodes
- Cut at a 45-degree angle just below a leaf node
- Remove lower leaves, keeping 2-3 at the top
- Dip the cut end in rooting hormone
- Plant the cutting in pre-moistened soil mix
- Gently firm the soil around the cutting
Table: Optimal Conditions for Rooting Hibiscus Cuttings
| Factor | Ideal Range |
|---|---|
| Temperature | 70-80°F |
| Humidity | 70-80% |
| Light | Bright, indirect |
| Watering | Keep soil moist, not soggy |
Caring for Newly Propagated Hibiscus
After planting your cuttings:
- Create a mini greenhouse effect using a clear plastic bag
- Place in a warm, bright location out of direct sunlight
- Mist the cuttings daily to maintain humidity
- Check for root development after 3-4 weeks
- Once roots form, gradually acclimate to normal conditions
- Transplant to larger pots when roots fill the container
Remember, patience is key. Hibiscus cuttings typically take 4-8 weeks to root fully. With proper care, you’ll soon have thriving new plants to enjoy or share with fellow gardeners.
Common Challenges in Hibiscus Propagation
Propagating hibiscus in soil can present several obstacles. Here are some common challenges and how to address them:
Pest and Disease Management
Pests and diseases can quickly derail hibiscus propagation efforts. To combat these issues:
- Inspect cuttings regularly for signs of pests like aphids, spider mites, or whiteflies
- Use neem oil or insecticidal soap to treat minor infestations
- Remove affected leaves or stems immediately to prevent spread
- Maintain good air circulation to reduce fungal diseases
- Apply a fungicide if you notice powdery mildew or leaf spots
- Sterilize tools between cuttings to prevent disease transmission
Pro tip: I’ve found that a weekly spray of diluted neem oil can work wonders in preventing pest problems before they start.
Troubleshooting Growth Issues
Growth problems can arise during hibiscus propagation. Here’s how to address common issues:
- Yellowing leaves:
- Cause: Overwatering or nutrient deficiency
- Solution: Adjust watering schedule or apply balanced fertilizer
- Leaf drop:
- Cause: Temperature stress or transplant shock
- Solution: Maintain consistent temperatures and minimize stress during transplanting
- Slow root development:
- Cause: Incorrect hormone application or poor soil conditions
- Solution: Use fresh rooting hormone and ensure well-draining soil mix
- Wilting:
- Cause: Underwatering or root rot
- Solution: Check soil moisture and adjust watering; ensure proper drainage
- Stunted growth:
- Cause: Insufficient light or nutrients
- Solution: Provide adequate light and fertilize appropriately
Remember, patience is key. Hibiscus cuttings can take 4-8 weeks to root fully, so don’t be discouraged if growth seems slow at first.
Best Practices for Successful Hibiscus Propagation
Timing Is Everything
I’ve found that timing plays a crucial role in hibiscus propagation. Spring and early summer are ideal for taking cuttings. During these seasons, hibiscus plants are in active growth, increasing the chances of successful rooting. Avoid propagating during winter when the plant is dormant.
Choosing the Right Cutting
Select healthy, semi-woody stems for propagation. Look for stems that are:
- 4-6 inches long
- Free from flowers or buds
- Have at least 2-3 leaf nodes
- Show no signs of disease or pest damage
Cut just below a leaf node at a 45-degree angle to maximize the rooting surface area.
Proper Soil Preparation
Prepare a well-draining soil mix for your cuttings:
- 1 part perlite
- 1 part peat moss
- 1 part coarse sand
This mixture provides adequate aeration and moisture retention for root development.
Rooting Hormone Application
Dip the cut end of your stem in rooting hormone powder or gel. This step boosts rooting success rates by:
- Stimulating root growth
- Protecting the cutting from fungal infections
Tap off excess hormone to avoid inhibiting root growth.
Creating the Ideal Environment
Maintain optimal conditions for your cuttings:
| Factor | Ideal Range |
|---|---|
| Temperature | 70-80°F (21-27°C) |
| Humidity | 70-80% |
| Light | Bright, indirect |
Use a clear plastic bag or propagation dome to create a mini-greenhouse effect, increasing humidity around the cuttings.
Watering and Misting
Keep the soil consistently moist but not waterlogged. Mist the cuttings daily to maintain high humidity. Reduce misting gradually as roots develop to acclimate the new plants to normal conditions.
Patience and Monitoring
Root development typically takes 4-8 weeks. Monitor your cuttings for signs of growth:
- New leaf growth
- Resistance when gently tugged
- Roots visible through drainage holes
Avoid disturbing the cuttings during this critical period.
Transplanting and Aftercare
Once roots are established, transplant your new hibiscus plants into larger pots or garden beds. Provide:
- Regular watering
- Balanced fertilizer (10-10-10) monthly during growing season
- Protection from direct sunlight for the first few weeks
By following these best practices, you’ll increase your chances of successfully propagating hibiscus in soil.
Conclusion
Propagating hibiscus in soil is a rewarding and cost-effective way to expand your garden. With the right techniques and a bit of patience, you’ll be able to grow beautiful new hibiscus plants from cuttings. Remember to choose healthy cuttings, prepare the soil mix carefully, and create an ideal environment for root development. By following these best practices, you’ll increase your chances of success and enjoy a thriving hibiscus collection. So why not give it a try? You’ll be amazed at how satisfying it is to watch your new hibiscus plants grow and bloom.