Transplanting Hibiscus Cuttings: Expert Tips for Successful Propagation
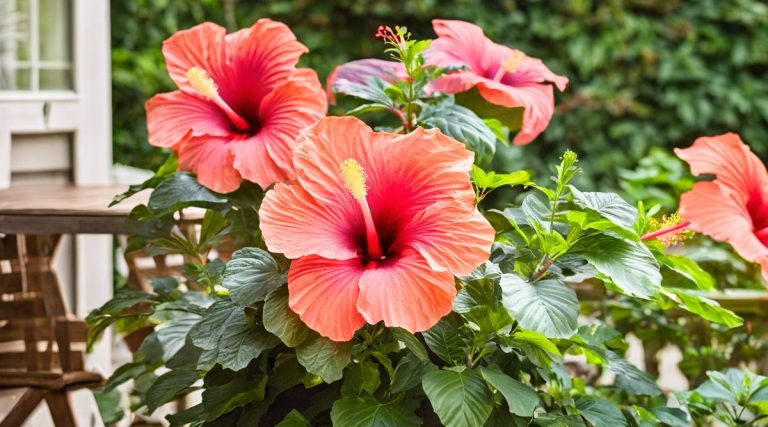
I’ve always been captivated by the vibrant beauty of hibiscus flowers. Their large, showy blooms can instantly transform any garden into a tropical paradise. But did you know that you can easily propagate these stunning plants through cuttings? It’s a cost-effective way to expand your hibiscus collection and share the joy with fellow gardeners.
Transplanting hibiscus cuttings might seem daunting at first, but with the right techniques, it’s a rewarding process that even novice gardeners can master. Are you ready to learn how to create new hibiscus plants from cuttings and give them the best start in life? In this article, I’ll guide you through the step-by-step process of transplanting hibiscus cuttings, ensuring your new plants thrive and bloom beautifully.
Understanding Hibiscus Cuttings
Hibiscus cuttings are an efficient way to propagate new plants from existing ones. They’re segments of stem taken from a healthy parent plant, capable of developing roots and growing into full-fledged hibiscus plants.
Types of Hibiscus Suitable for Cuttings
Not all hibiscus varieties are equally suited for propagation through cuttings. Here’s a breakdown of the most suitable types:
- Tropical Hibiscus (Hibiscus rosa-sinensis):
- Easiest to propagate
- Vibrant, large flowers
- Ideal for warm climates
- Hardy Hibiscus (Hibiscus moscheutos):
- More challenging but possible
- Larger, dinner plate-sized blooms
- Cold-hardy, suitable for cooler regions
- Rose of Sharon (Hibiscus syriacus):
- Moderately easy to propagate
- Smaller, prolific blooms
- Adaptable to various climates
| Hibiscus Type | Ease of Propagation | Flower Size | Climate Suitability |
|---|---|---|---|
| Tropical | High | Large | Warm |
| Hardy | Moderate | Very Large | Cool to Warm |
| Rose of Sharon | Moderate | Small | Versatile |
Best Time to Take Cuttings
Timing is crucial for successful hibiscus propagation. Here’s when to take cuttings:
- Spring to early summer:
- Ideal for most hibiscus varieties
- Plants are in active growth phase
- Higher success rate for rooting
- Late summer to early fall:
- Suitable for tropical hibiscus
- Avoid in colder regions
- Requires extra care during winter
- Avoid winter:
- Plants are dormant
- Lower success rate
- Risk of frost damage
Tips for optimal cutting time:
- Choose a day when the plant isn’t water-stressed
- Take cuttings in the morning when stems are full of water
- Avoid extremely hot or cold days
- Check local frost dates for your area
Remember, while these guidelines are helpful, hibiscus plants can be quite forgiving. I’ve successfully propagated cuttings outside these ideal times with a bit of extra care and attention.
Preparing for Transplantation
Transplanting hibiscus cuttings requires careful preparation. Having the right tools and selecting healthy cuttings are crucial steps for successful propagation.
Essential Tools and Materials
To transplant hibiscus cuttings effectively, you’ll need:
- Sharp, clean pruning shears
- Small pots (3-4 inches in diameter)
- Well-draining potting mix
- Rooting hormone powder
- Clear plastic bags
- Plant labels and a permanent marker
I’ve found that using a high-quality potting mix specifically designed for cuttings enhances root development. It’s also helpful to sterilize your tools before use to prevent disease transmission.
Selecting Healthy Cuttings
Choosing the right cuttings is key to successful hibiscus propagation:
- Look for new growth: Select stems that are green and pliable.
- Check for nodes: Choose stems with at least 2-3 leaf nodes.
- Avoid flowering stems: These are less likely to root successfully.
- Length matters: Cut stems about 4-6 inches long.
- Timing is crucial: Take cuttings in the morning when plants are well-hydrated.
In my experience, cuttings from the middle section of the plant often root more readily than those from the top or bottom. Remember to take more cuttings than you need, as not all will survive the transplanting process.
Steps to Transplant Hibiscus Cuttings
Transplanting hibiscus cuttings is a straightforward process that requires attention to detail. I’ll guide you through the essential steps to ensure your cuttings thrive in their new environment.
Preparing the Potting Mix
Creating the right potting mix is crucial for hibiscus cuttings. Here’s how to prepare it:
- Combine equal parts peat moss, perlite, and vermiculite
- Add a small amount of slow-release fertilizer to the mix
- Moisten the mixture slightly before use
This blend provides excellent drainage and nutrients for your cuttings. I’ve found that a well-draining mix prevents root rot, a common issue with hibiscus cuttings.
Planting the Cuttings
Planting hibiscus cuttings correctly sets the stage for successful growth:
- Fill small pots with the prepared potting mix
- Make a hole in the center of each pot using a pencil or stick
- Remove lower leaves from the cutting, leaving 2-3 leaves at the top
- Dip the cut end in rooting hormone powder
- Gently insert the cutting into the prepared hole
- Press the soil firmly around the cutting to eliminate air pockets
Remember, planting multiple cuttings increases your chances of success. I typically plant 3-4 cuttings per variety.
Providing Proper Care After Transplanting
After transplanting, proper care is essential for the cuttings to root and thrive:
- Water thoroughly after planting
- Place the pots in a warm, bright location, but avoid direct sunlight
- Maintain high humidity by covering the pots with clear plastic bags
- Remove the bags for a few hours daily to prevent mold growth
- Keep the soil consistently moist, but not waterlogged
- After 4-6 weeks, gently tug the cuttings to check for root development
- Once rooted, gradually acclimate the plants to normal conditions
| Care Aspect | Frequency | Details |
|---|---|---|
| Watering | Daily | Keep soil moist but not soggy |
| Misting | 2-3 times/day | Increases humidity |
| Fertilizing | Every 2 weeks | Use weak, balanced fertilizer |
With these steps, you’ll give your hibiscus cuttings the best chance to grow into beautiful, thriving plants.
Common Challenges When Transplanting Hibiscus Cuttings
Transplanting hibiscus cuttings isn’t always a walk in the park. Even experienced gardeners face hurdles along the way. Let’s explore some common challenges and how to overcome them.
Dealing with Pests and Diseases
Pests and diseases can quickly derail your hibiscus cutting’s progress. Here’s how to tackle these issues:
- Aphids: These tiny pests love tender new growth. Spray them off with water or use insecticidal soap.
- Spider mites: Look for fine webbing on leaves. Increase humidity and use neem oil to control infestations.
- Fungal diseases: Prevent by avoiding overwatering and ensuring good air circulation.
- Root rot: Caused by overwatering or poor drainage. Use well-draining soil and pots with drainage holes.
Tip: Regularly inspect your cuttings for signs of trouble. Early detection is key to successful treatment.
Troubleshooting Rooting Issues
Rooting problems can be frustrating, but they’re not insurmountable:
- No root development:
- Check hormone application: Ensure you’ve used rooting hormone correctly.
- Adjust humidity: Create a mini-greenhouse effect with a clear plastic bag.
- Temperature control: Maintain warmth (70-80°F) for optimal rooting.
- Wilting cuttings:
- Reduce water loss: Trim large leaves to decrease transpiration.
- Mist regularly: Keep humidity high without waterlogging the soil.
- Yellowing leaves:
- Check for nutrient deficiencies: Use a balanced, diluted fertilizer once roots appear.
- Adjust light levels: Ensure cuttings receive bright, indirect light.
- Rotting stems:
- Remove affected parts: Cut away any soft, discolored areas.
- Improve air circulation: Space cuttings apart to prevent disease spread.
Remember, patience is key. Some hibiscus varieties take longer to root than others. With proper care and attention, most rooting issues can be resolved.
Tips for Successful Hibiscus Cutting Transplants
Transplanting hibiscus cuttings requires attention to detail and proper care. Here are some essential tips to ensure your hibiscus cuttings thrive in their new environment.
Optimal Growing Conditions
Hibiscus cuttings need specific conditions to grow successfully:
- Light: Bright, indirect sunlight for 6-8 hours daily
- Temperature: 70-80°F (21-27°C)
- Humidity: 50-60%
- Soil: Well-draining, slightly acidic (pH 6.0-6.5)
- Water: Keep soil consistently moist but not waterlogged
I’ve found that using a humidity tray or clear plastic bag over the cuttings helps maintain moisture levels. Remember to remove the cover gradually to acclimate the cuttings to normal conditions.
Pruning and Maintenance
Proper pruning and maintenance are crucial for healthy hibiscus cuttings:
- Pinch back new growth to encourage bushiness
- Remove any yellowing or dead leaves promptly
- Fertilize lightly with a balanced, water-soluble fertilizer once roots develop
- Transplant to larger pots when roots fill the current container
Prune hibiscus cuttings in spring or early summer for best results. I’ve learned that regular pruning not only shapes the plant but also stimulates new growth and flowering.
| Maintenance Task | Frequency |
|---|---|
| Pinching | Every 2-3 weeks |
| Leaf removal | As needed |
| Fertilization | Every 2-4 weeks |
| Repotting | Every 6-12 months |
By following these tips, you’ll give your hibiscus cuttings the best chance to develop into healthy, vibrant plants.
Conclusion
Transplanting hibiscus cuttings is a rewarding journey that brings beauty to your garden while saving money. With the right knowledge timing and tools you’ll be well-equipped to overcome common challenges and nurture healthy vibrant plants. Remember patience is key as you navigate the rooting process and provide optimal growing conditions. By following these guidelines and staying attentive to your cuttings’ needs you’ll soon enjoy a flourishing hibiscus collection. Happy gardening and may your efforts bloom into stunning success!